installing Universal stacking kit for washer and dryer
Introduction:
Installing a washer and dryer stackable rack by yourself can save installation costs and give you a sense of accomplishment. However, during installation, many users may encounter technical issues or confusion. This article will provide you with detailed installation steps and answer some common questions to help you successfully install the rack, ensuring your appliances are secure and easy to use.
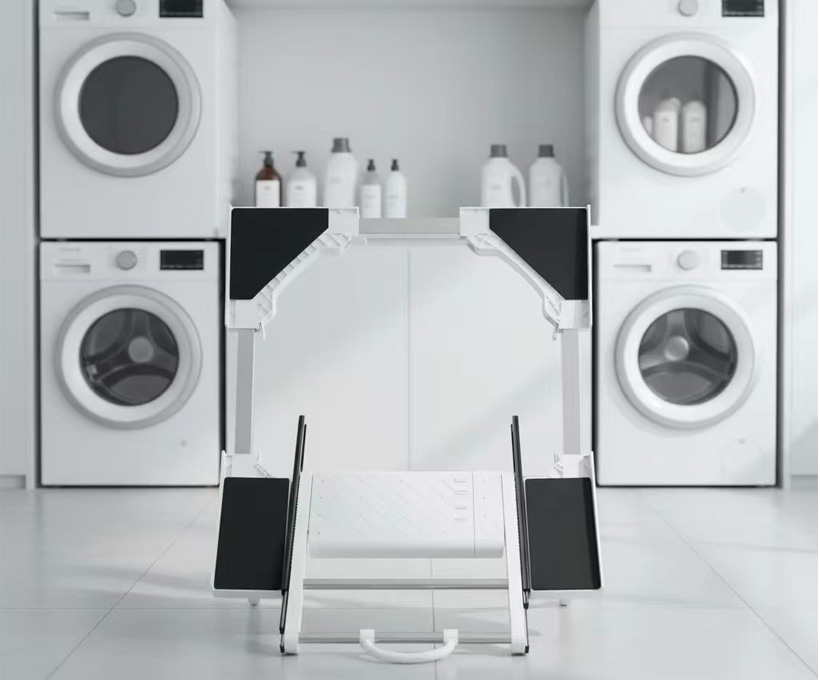
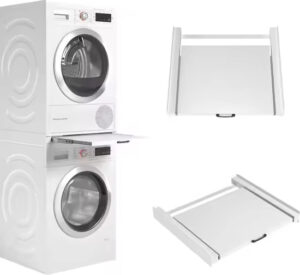
Metal stacking kit for washer and dryer
⸻
Installation Steps:
In Super Gold Ideas you just take the installing vidoe for reference,it is easy and convenience.
link 1:https://youtube.com/shorts/0aZZro5yEG4?si=FpIxY0C7L19Wjl8Y link 2:https://youtube.com/shorts/ZqG4Ipe9pJ0?si=4wpf8g3tHuOm0FOk link 3:https://youtu.be/JKihKqtYZZI?si=WNRmlNhVeBTYZWf6
Next steps are other brands stacking kit for washer and dryer.
1. Preparation
•Tools You’ll Need: You will need a screwdriver, power drill (for drilling holes), level, wrench, etc.
•Check the Rack and Accessories: Before starting the installation, ensure all parts of the stackable washer dryer rack and accessories are intact and confirm that the rack is compatible with your washer and dryer model.
2. Installing the Rack
•Choosing a Location: Pick a suitable spot where stacking the washer and dryer won’t block pathways. Ensure the rack’s base is placed on a stable and flat surface.
•Secure the Base of the Rack: Fix the base of the rack to the floor or wall of the laundry room according to the instructions. Make sure all screws are tightly secured to ensure stability.
•Install the Top Part of the Rack: Attach the top structure of the rack to the washer. Use the provided screws to securely fasten the washer to the rack, ensuring a tight connection between both.
•Place the Dryer: Finally, gently place the dryer on top of the stackable rack, ensuring it is stable and tightly connected to the rack. Check all connection points to make sure the dryer is not wobbling.
3.Check Stability
•Use a level to verify that the rack is installed horizontally. Ensure both the washer and dryer are aligned and that there is no tilt.
Metal stacking kit for washer and dryer
⸻
Common Questions and Solutions
Question 1: The stackable rack doesn’t fit my washer and dryer model. What should I do?
Solution:
Most stackable racks are universal, but not all washers and dryers are compatible. To ensure your appliances fit the rack, consider the following:
•Check the Product Manual: Most racks will list compatible washer and dryer brands and models. Ensure that the rack you are purchasing fits your devices.
•Measure the Dimensions: Before buying, measure the height, width, and depth of your washer and dryer to ensure the stackable washer dryer rack can accommodate these dimensions.
•Consider Adjustable Racks: If your appliances have special sizes, look for adjustable racks that allow for more flexibility in accommodating different dimensions.
If the rack doesn’t fit, consider choosing a more compatible model or contact the manufacturer for compatibility information.
Question 2: After installation, the dryer is unstable or wobbles. What should I do?
Solution:
An unstable rack is a common issue, especially if the rack wasn’t installed correctly or the appliances aren’t aligned properly. To fix this issue:
•Check Rack Fixing: Ensure all screws and fasteners are fully tightened. Loose connections can cause instability.
•Align the Washer and Dryer: Ensure the washer and dryer are properly aligned on the rack so that the weight is evenly distributed across the rack.
•Use Anti-Vibration Pads: If there are uneven spaces between the rack and appliances, use anti-vibration pads to reduce wobbling and increase stability.
•Re-adjust Installation: If the issue persists, refer back to the installation instructions and verify that every step, especially how the appliances are supported, is followed correctly.
Question 3: There’s too much space between the washer and dryer, affecting their usage. What should I do?
Solution:
Sometimes, the design of the rack may result in a gap between the washer and dryer, which can affect both the appearance and functionality. Here’s what you can do:
•Adjust the Rack’s Height and Depth: Some racks allow you to adjust the space between the washer and dryer. You can make the necessary adjustments to reduce the gap.
•Install a Spacer or Filler: If the rack doesn’t allow for space adjustment, consider installing a spacer or filler between the appliances, as long as it doesn’t interfere with ventilation or drainage.
•Check Rack Compatibility: If the gap is too large, it could mean the rack isn’t suitable for your washer and dryer model. In this case, you may want to switch to a rack that better fits your appliances.
Question 4: Some parts of the rack are missing or damaged during installation. What should I do?
Solution:
If you notice missing or damaged parts during installation, don’t panic. Here are a few solutions:
•Contact Customer Service: Most manufacturers offer customer support. If parts are missing or damaged, contact the retailer or manufacturer to request replacements.
•Check the Packaging: Before starting the installation, make sure to unpack and check all parts. Many issues can be avoided by ensuring that everything is in place before beginning.
•Purchase Replacement Parts: If parts are missing or damaged, you can often find replacement parts online or visit a local hardware store for the necessary components.
Question 5: How can I ensure the rack is installed securely and prevent the appliances from tilting or falling?
Solution:
It’s crucial to make sure the rack is securely installed to prevent the appliances from tilting or falling. Here’s how to ensure safety:
•Use Proper Tools: Make sure you are using the right tools (such as a screwdriver and power drill) to tighten screws and fasten parts. This ensures the rack is securely installed.
•Level Check: Use a level to check if the rack is installed horizontally. If the rack is not level, it could cause the appliances to tilt.
•Avoid Overloading: Ensure that the rack is rated to support the total weight of your washer and dryer. Excessive weight could lead to bending or damage to the rack.
•Regularly Inspect the Rack: Even after installation, check the stability of the rack periodically, especially after a few months of use, to ensure there are no loose or unstable parts.
Question 6: After installation, how should I clean and maintain the stackable rack?
Solution:
Cleaning and maintaining your washer and dryer stackable rack is essential to prolong its lifespan and keep your appliances in good condition:
•Regularly Wipe Down the Rack: Use a clean, damp cloth to wipe down the rack’s surface and remove dust and dirt. Avoid using harsh chemicals that may damage the rack’s finish.
•Clean the Dryer Vent: Periodically check and clean the dryer vent to ensure there’s no dust buildup or blockages. Blockages can affect drying efficiency and even pose safety risks.
•Inspect Screws and Fasteners: Regularly check the screws and fasteners on the rack to ensure they are not loose. Tighten any that have become loose over time.
•Prevent Moisture Build-Up: Try to avoid water or excess humidity around the rack area. Keep the area ventilated to prevent rust or corrosion of metal parts.
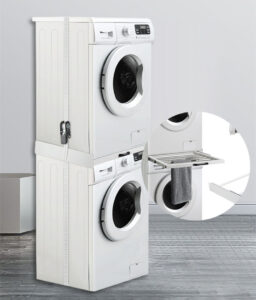
Factory Wholesale 29 Inch Washer Dryer Stacking Kit Universal Stacking Kit For Washer And Dryer Adjustable 292827262524 Washer And Dryer Stacking Kit With Ratchet Strap
⸻
Conclusion:
By following these simple steps, you can successfully install your stackable washer dryer rack and make the most of your limited space. Additionally, the common troubleshooting solutions provided can help you address any issues during installation, ensuring the rack is secure, stable, and ready for use. If you encounter any other problems, refer to the solutions in this article, and you’ll be able to overcome them with ease. We hope this guide helps you complete a successful installation and enhance your home’s efficiency!
通讯更新
请输入您的电子邮件地址进行订阅
一条评论
Hi, this is a comment.
To get started with moderating, editing, and deleting comments, please visit the Comments screen in the dashboard.
Commenter avatars come from Gravatar.
Hi, this is a comment.
To get started with moderating, editing, and deleting comments, please visit the Comments screen in the dashboard.
Commenter avatars come from Gravatar.